Custom Point Symbols
in ArcGIS Pro
For stylizing maps in ArcGIS Pro, delving into the advanced options for customizing and formatting point symbols by using fonts can enhance the style and production value of your maps. Here I'll walk you through the basics of expanding your icon options far beyond the default gallery and create great custom color scheme symbols like these.

ArcGIS Pro includes a large library of ESRI symbol fonts commonly used in different industries and cartography projects. They are all the "ESRI (NAME)" fonts. Since it can be an annoying time sink to sort through the fonts while trying to apply symbology in your map, here's a PDF guide I assembled showing the symbols included in each ESRI font.
Before jumping into formatting of the symbology, lets talk about map scale! In building your symbology, it can be a time saver to design your map around the intended scale of your final product, so that all the icons relate to each other properly, and you won't have to reformat symbols once creating a layout. Setting a Reference Scale will lock in the size of your icons at the scale of your intended map, resulting in symbols and features that stay the same size respective to the map instead of staying the same size respective to your screen as you scroll in and out while working.
To set a Reference Scale, right click on your Map in the Contents, select Properties, and under the General Tab you can select the reference scale.

In the drop down Scale Box in the lower left Map window, you can select customize to adjust the Scale Format, to easily set scales like 1 inch = X number of miles. For this project, I have set the format the 1 inch = 1 mile and then saved that scale (the same as 1:63,360) as the Reference Scale.
Let's make a custom symbol for an imagined point feature class of Recycling Centers. Right click on the feature class in Contents Pane and open the Symbology Pane. Since we are going to only create one symbol to represent this entire feature class, we will stick with Single Symbol as the Primary Symbology. If you had a feature class where you desired different symbols to represent varying features in your dataset, here you could choose Unique Symbols to craft a set of icons based on a field value in the feature class Attribute Table.
The default symbol for a point class is a random colored dot with a thin outline. Click on that symbol to open the Format Point Symbol menu. (alternatively, you can click on the symbol itself in the Contents Pane to directly open the properties window. Initially, the Gallery menu of symbols will open, but to begin crafting a unique symbol, click on the Properties tab. Then go directly to the the Layers (click on the stack of squares). The Layers section of Format Point Symbol is where the bulk of the customization process is driven from. Here you can insert the shape from a preset Style, a Font, or a File (uploading a 2d Vector File). Choose "Font..."
This will open the Choose a character screen. Initially the font will be something, usually letters, you choose your desired Font set from the Font dropdown. Many fonts also have subsets that can be accessed from the Subset dropdown. Refer to the PDF guide to ESRI fonts above to easily find desired symbols without wasting time resetting dropdown menus here. For this recycling center dataset, I have chosen a recycling arrows icon included in the ESRI NPS 9.1 Latin-1 Supplement. This is one of the standard National Park System symbol font sets. ESRI has not included these in their standard set of fonts, they are available to download from the NPS, so you can download and install them in your system if you want. They are free use, public domain material. Don't forget that getting the fonts to show in ArcGIS Pro will require closing and reopening the program if you install a font while it is open. Different styles of recycling icons can be found in other ESRI fonts such as ESRI Commodities.
If you are unfamiliar with acquiring and installing new fonts I have a guide here.
Download ESRI National Park Font Set
It can some acclimation and trial and error to figure out how symbols are meant to be used or combined. Creating one unique symbol is a process of combining, stacking, and adjusting multiple symbol layers. Shape markers are they type of marker that creates a layer from an font icon, and will be what we are using. Each individual shape marker can only have one color, and one outline color. Their size, position, and angle of rotation can be adjusted to create different combinations of symbol layers to create a single Point Symbol. Letters and numbers, and any icon can be combined, as we will see later.
Let's get symbol constructing!
The key when looking at characters is that black pixels are the elements that can be stylized. This means that for the first icon in this series of recycling icons, the arrows are transparent and the box around them can be colorized. There are often more than one way to achieve a symbology goal. For this symbol, let's create a blue arrow with a white background and blue outline. To get there, we will start with the third option. Select that option and click OK. The symbol populate in the Format Point Symbol likely very small because it kept the initial point size. I increased the Size to 24 pt to be more appropriate to my set reference scale (here is where having a set reference scale is very helpful) I then changed the color to blue, and gave it a thin darker blue outline, just 0.2 pt. In the preview box at the bottom you can zoom in or out on the icon or select to view it at 100%, which is the size tied to your reference scale.
Notice the icon is transparent within. If we want a different colored solid background, we need to add and appropriately layer an additional shape marker.
To build the layers click on the "Structure" icon (the wrench) in Format Point Symbol. Here you can add layers and effects to those layers. This is where the rabbit hole truly begins and the huge amount of creativity and customization is available. We'll keep it real simple for now. To get a new layer, you can click "Add symbol layer" and choose Marker layer, or you can copy an existing layer by clicking the Duplicate layer icon (two sheets of paper) next to an existing layer. This option is useful because often you will be using icons in a similar family or size, so it can save some time.
Duplicate the recycling layer. With multiple layers, you can drag them up and down here to layer them in the appropriate order, lowest being on the bottom, considering the layers are a stack. Then return to the Layers page (stack of three squares icon). Now there will be your addition symbol layers. Clicking the check box on and off turns the individual layer on or off.
To get a white background, we are going to affect the bottom symbol layer by selecting it (becomes highlighted blue) and clicking on the Font form to insert from. Back at the Choose a character screen, I've selected a solid box. Note that on the character page, in the icons, black pixels are solid (something you can adjust the color of) and white is transparency. Also, many Font families have boxes and box outlines that seem very close in shape but have minor differences of shape. Trial and error and using the preview screen to zoom far in and see fine details helps combine icons properly.
Back in Format Point Symbol I've eliminated the outline, and set the color to white to complete the symbol.
Now looking at the size of our icon at the Reference Scale. Let's take a quick look at a more complicated but common icon- A highway shield. Placing a shield on a specific location may be best accomplished with Map Notes, since it is not a specific data point, but the symbol formatting is the same.
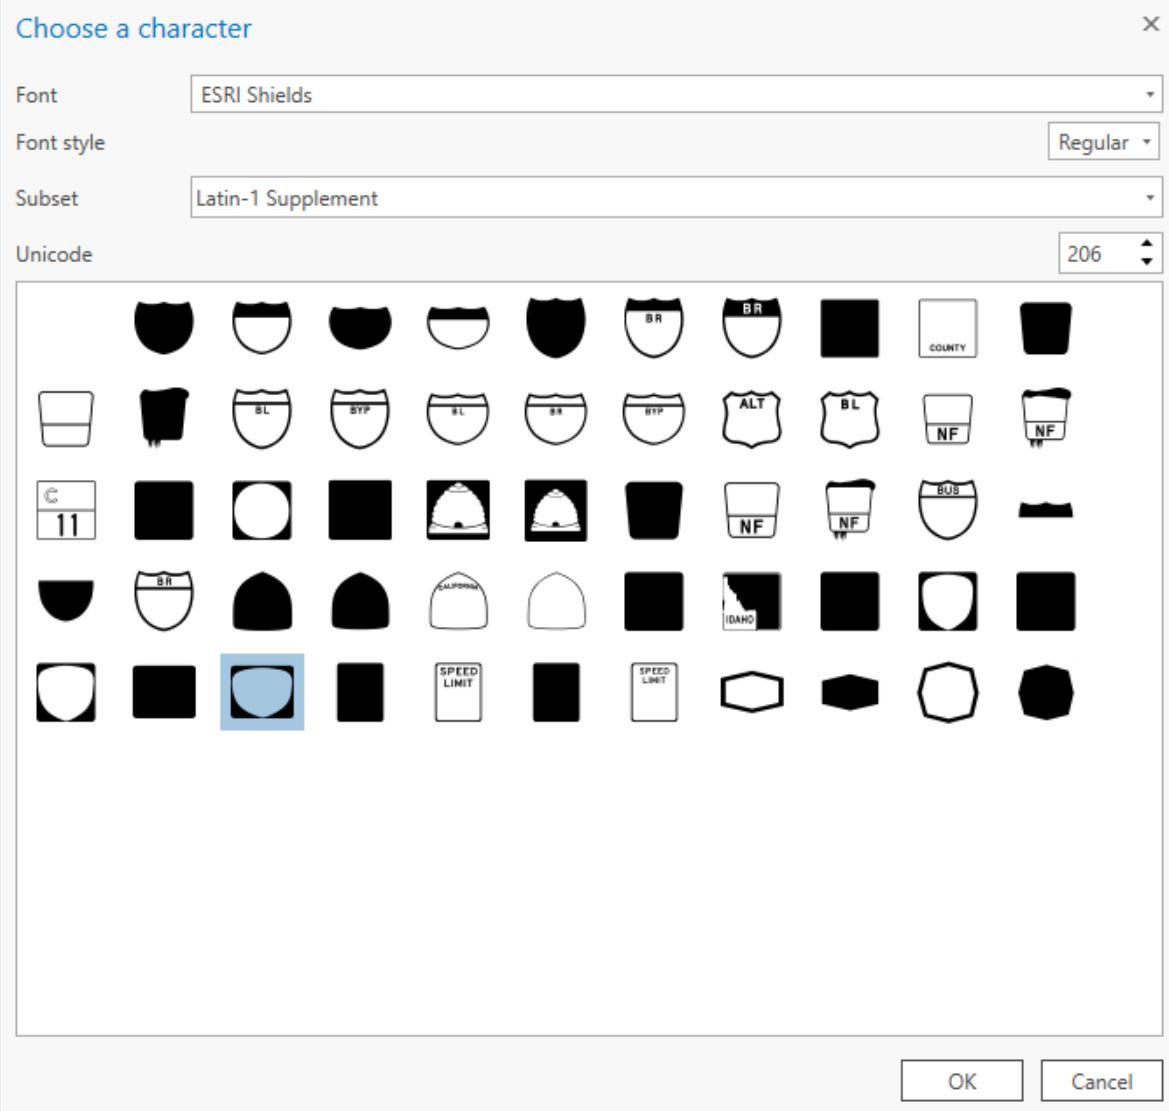
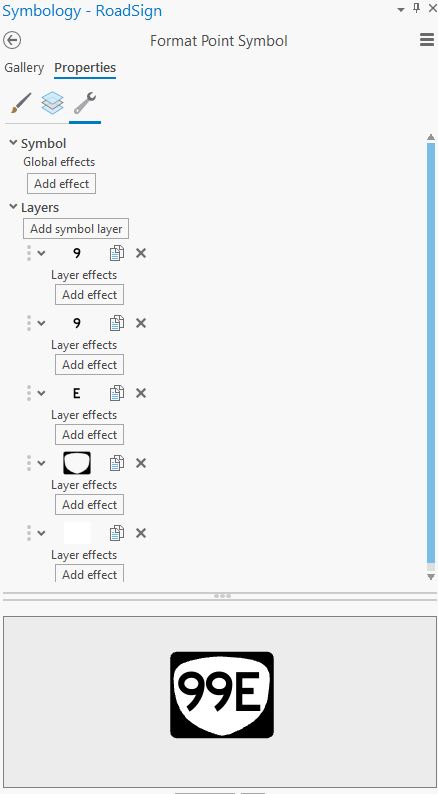
Highway shields are a good example of icons that are composed of many pieces, especially ones like Interstate icons that are colorful. The red section, blue section, black outline, and each number or letter is an individual symbol layer. ESRI Shields is a font containing many of the unique shields for national and state transportation systems. Notice that is has 3 versions of the Oregon State Highway rounded edge Shield (in the Latin-1 Supplement) for 1, 2 or 3 character wide designations. Let's look at how one for 99E would be constructed. It is going to consist 5 seperate layers, "9", ",9", "E", the black shield outline and the white shield background. (Note- if you are looking at making labels for a whole feature class instead of a unique symbol, generating the different numbers can be accomplished with the labeling tab to place on top of the shield symbol)
I've used the Highway Gothic typeface for the letters, which is the standard FHWA font for US highway signs. It's not included with ArcGIS Pro, but can be found free on the internet. Any sans serif narrow block character font will do.
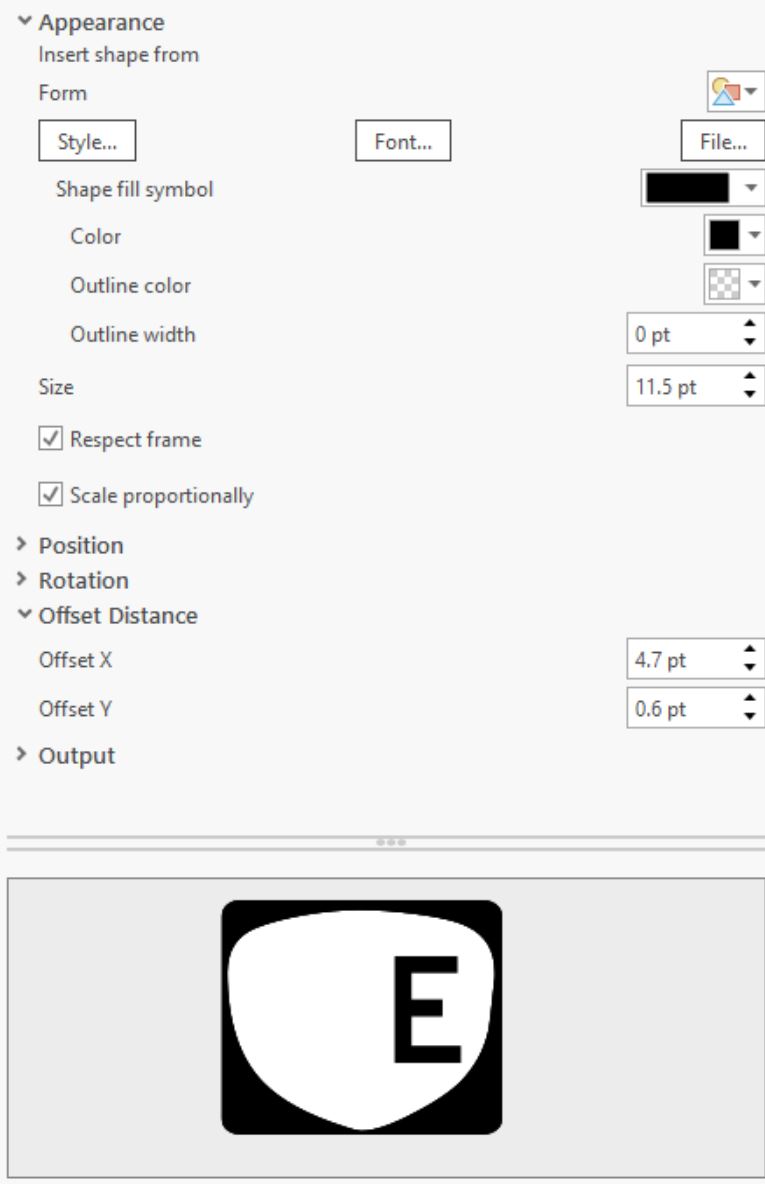
When initially added, each character is centered on the point symbol. To align them to read 99E instead of all stacked on each other, make changes to each layers Offset Distance in the Layers Properties. It can take very small incremental fraction of a point offsets, both in the X and Y direction to perfectly position each shape marker, combined with adjusting the font size.


So many possibilities!
There are a huge number of icons in ESRI font sets to peruse and creatively combine into Point Symbols, but there are also many more that can be added to ArcGIS Pro. Google's Noto font collection contains a couple Noto Sans Symbols sets with a diverse set of icons, and there are many other free sets out there.
Point symbols can also be added to your Map Layout when designing your map to print, and manipulated with the same process, adding a component of graphics to your Layout without using images.


